
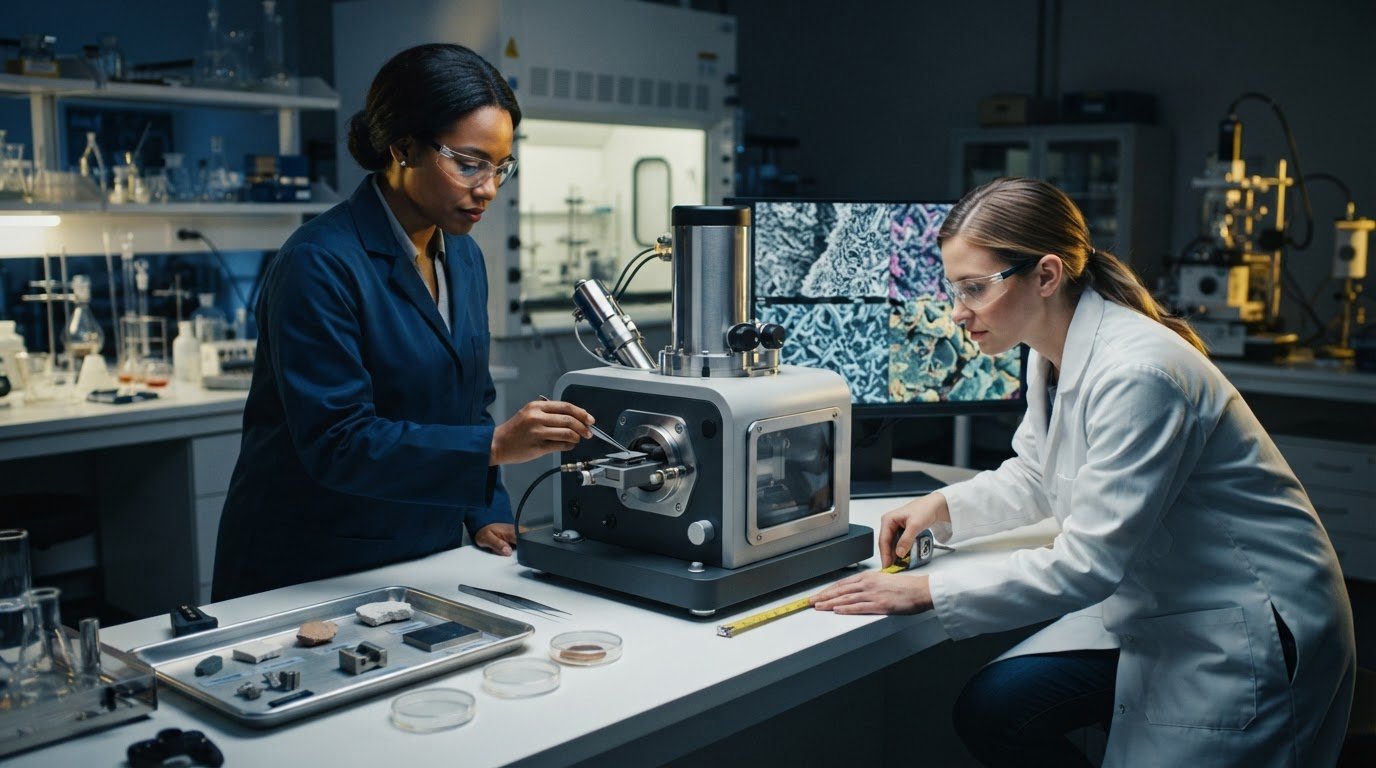
A benchtop SEM demo is most useful when it focuses on the samples and imaging questions your lab actually faces. To learn how to get a demo of a benchtop SEM, describe your application, bring representative samples, and evaluate an instrument against your requirements. Use the demonstration to assess sample handling, image quality, and the space and setup needed in your lab.
A polished image alone is not enough: the microscope must handle your samples and support the analysis you need. A focused demonstration lets you assess these practical factors directly, including how sample size and surface condition affect imaging, which details matter for your application, and whether the instrument fits the intended location.
This guide covers how to prepare for a productive demo, what to examine during imaging, and how to assess your lab’s space needs. It also explains sample-handling and vacuum considerations to help you make the session relevant to your workflow and judge the instrument against your requirements.
Key Takeaways
- Bring representative samples and define the imaging questions you need the demo to answer.
- Assess image quality against your application, including the surface details and analysis that matter to your work.
- Compare relevant benchtop SEM models by how well they fit your samples, imaging needs, and lab setup.
- Review sample condition, handling, and vacuum requirements before the demonstration to avoid preventable issues.
- Measure the intended installation space and consider the instrument’s placement in relation to your lab workflow.
What happens during a benchtop SEM demonstration, and how long does it take?
A benchtop SEM demonstration is a hands-on evaluation of sample handling, imaging, and operating workflow. Bring representative specimens and application questions, then observe how the instrument images them under selected conditions. Desktop SEM and tabletop SEM are other names for this general instrument category. A useful session connects your intended work to real samples, rather than relying on a generic instrument overview.
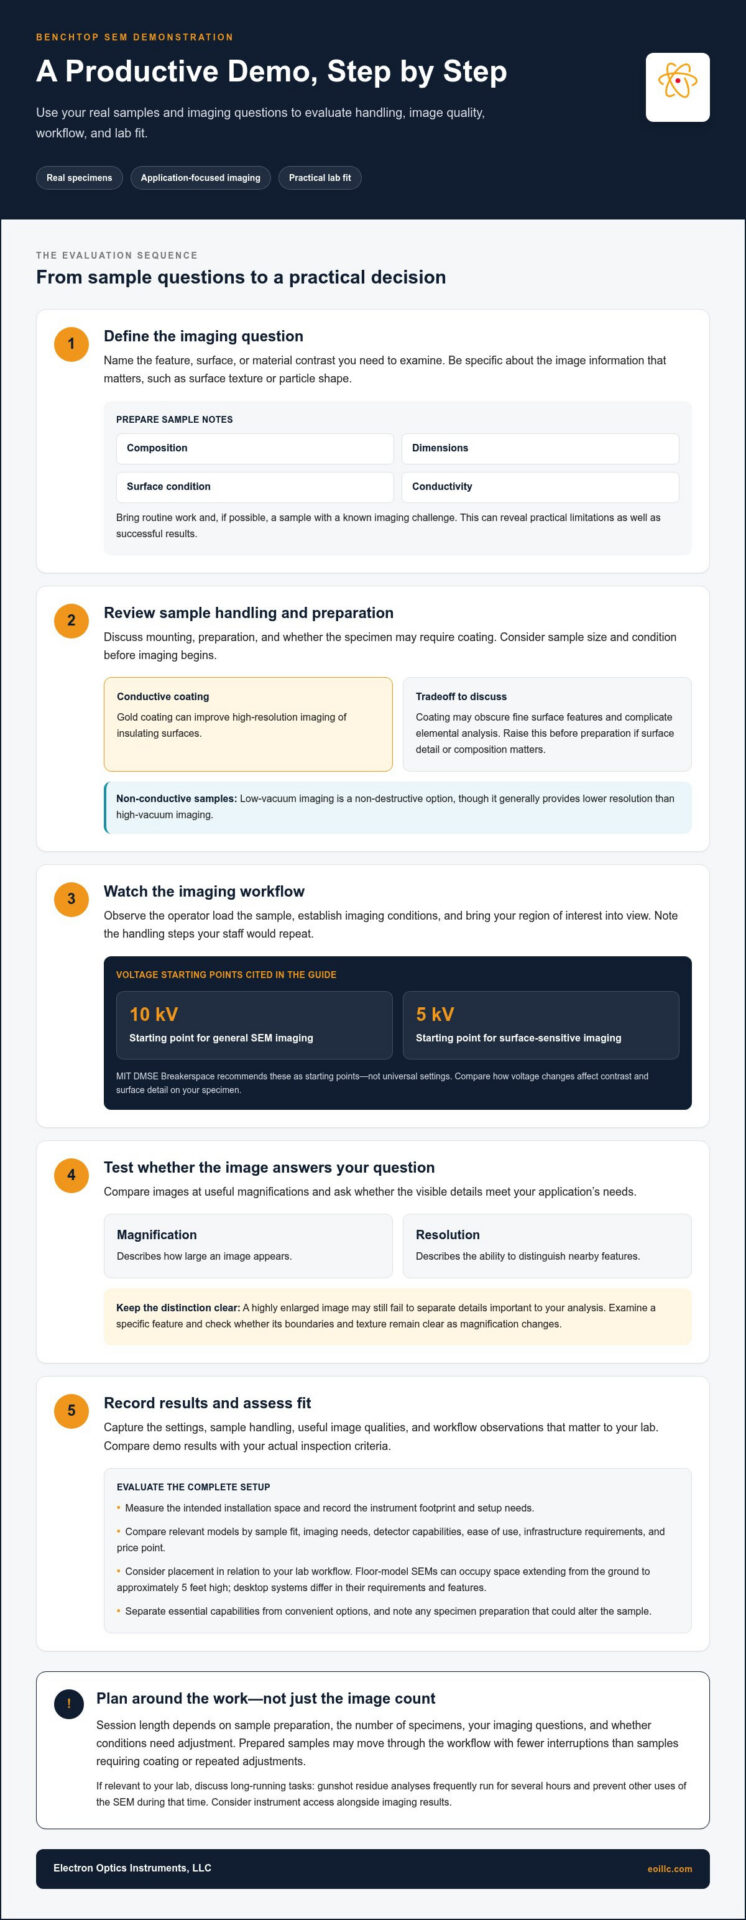
Start with a clear imaging objective: identify the feature, surface, or material contrast you need to examine. Before the session, organize details about each sample, including its composition, dimensions, surface condition, and conductivity. Bring an example of routine work and, if possible, one with a known imaging challenge. This helps reveal practical limitations as well as successful results.
During the demonstration, follow a deliberate sequence:
- Describe the application and identify the image information needed, such as surface texture or particle shape.
- Review sample mounting and preparation, including any coating required for the specimen.
- Watch the operator load the sample, establish imaging conditions, and bring the region of interest into view.
- Compare images at useful magnifications and discuss whether the visible details answer your application question.
- Record the settings, handling steps, and workflow observations that matter to your lab.
Magnification describes how large an image appears, while resolution describes the ability to distinguish nearby features. They answer different questions: a highly enlarged image may still fail to separate details important to your analysis. Ask to examine a specific feature on your sample, then assess whether its boundaries and texture remain clear as magnification changes.
Accelerating voltage is the energy setting used to drive the electron beam into the sample. MIT DMSE Breakerspace recommends 10 kV as a starting voltage for general SEM imaging and 5 kV as a starting voltage for surface-sensitive imaging. Treat these as starting points, not universal settings. During the demo, compare how changes in voltage affect contrast and surface detail on the specimen you brought.
Coating is a conductive layer applied to some insulating samples to support imaging. Gold coating can improve high-resolution SEM imaging of insulating surfaces, but it may obscure fine surface features and complicate elemental analysis. Discuss that tradeoff before sample preparation if surface detail or composition matters. Low-vacuum SEM imaging is a non-destructive option for non-conductive samples, though it generally provides lower resolution than high-vacuum imaging.
The total session time depends on sample preparation, the number of specimens, your imaging questions, and whether conditions need adjustment between observations. A prepared sample may move through the workflow with fewer interruptions than one requiring coating or repeated imaging adjustments. Plan the session around the decisions you need to make, not image volume alone.
Use the final discussion to distinguish essential capabilities from convenient options. Compare the demo images with your actual inspection criteria, note any preparation that could alter the specimen, and identify workflow steps your staff would repeat. Floor-model SEMs can occupy space extending from the ground to approximately 5 feet high, while desktop systems differ in detectors, ease of use, infrastructure requirements, and price point. Record the instrument’s footprint and setup needs alongside the imaging results.
If composition matters, discuss whether coating could interfere with analysis before interpreting the images. Use the final part of the session to review which observations are reliable, which settings produced useful results, and what further checks your application may require. Keep the discussion focused on the specimens and questions you brought, so the demonstration informs a practical decision about fit, not just image quality.
Allow time to discuss scheduling as well as imaging. Gunshot residue analyses frequently run for several hours and prevent other uses of the SEM during that time. If this work is relevant to your lab, discuss how it could affect instrument access and whether the workflow suits your needs. For other applications, identify any long-running tasks you expect and raise them during the demonstration. Before the session ends, summarize the sample preparation, operating steps, and image qualities that matter most to your work. Then compare the demonstration with your routine requirements and identify any remaining questions. A useful evaluation clarifies both the images obtained and the practical demands of your intended work.
Which benchtop SEM models can I compare in a demo?
A benchtop SEM is a compact scanning electron microscope designed for desktop or tabletop placement. Since desktop, benchtop, and tabletop describe the same general instrument category, compare models by how they perform your work, not by label alone. Start with the samples, image details, and analysis methods your lab uses. A model suited to routine surface inspection may not match a workflow requiring additional detector capabilities or specialized sample handling.
A detector captures signals produced when the electron beam interacts with a sample. Detector options can differ between desktop and floor-model SEMs, so identify which signals your application needs before comparing demonstrations. For example, a materials lab examining surface structure should assess the image information it needs, while a workflow involving elemental analysis should consider whether the instrument configuration supports that task. Compare results from relevant samples rather than treating a longer feature list as proof of fit.
Ease of use is the effort required to move from loading a sample to obtaining a useful image. During each demo, observe the same basic workflow: mounting, navigation, focusing, adjusting imaging conditions, and saving or reviewing results. Note where the operator must intervene and which steps a routine user could perform independently. A model may produce useful images yet require a workflow that does not suit the lab’s staffing or training needs. Record specific observations, such as whether the operator can return to a feature consistently.
Infrastructure requirements are the facility conditions and supporting arrangements needed to install and operate an instrument. Desktop and floor-model SEMs can differ in these requirements, so include installation constraints in your comparison. Review the instrument’s footprint, intended location, access for sample loading, and any facility provisions discussed during the demonstration. A compact exterior alone does not establish that a system fits your lab’s workflow. Map the proposed position against benches, nearby equipment, and the path used to bring samples to the microscope. If preparing your workspace requires physical adjustments or facility upkeep, infrastructure providers like houseofmaverick.co.za offer maintenance and commercial property solutions to support operational spaces.
Price point is the relative cost position of models being compared, not a measure of imaging performance. Compare it only alongside the capabilities and operating requirements relevant to your work. The available research identifies price point as one difference between desktop and floor-model SEMs, but a useful decision still depends on application fit. Avoid ranking systems by price alone. Instead, distinguish essential requirements, such as a suitable detector or sample workflow, from options that would rarely contribute to your analysis.
Use a comparison record to keep every demonstration consistent. For each model, capture the same categories:
- Sample fit: Note whether representative specimens can be mounted and imaged as required.
- Image assessment: Record whether the demonstrated detail answers a defined inspection question.
- Workflow: Describe the steps needed to reach and document a useful image.
- Detectors: Identify which available signals support the intended analysis.
- Lab integration: Compare placement and infrastructure needs with your actual space.
Keep the comparison tied to a decision. If two models produce images that meet the same requirement, workflow and infrastructure may become stronger differentiators. If only one demonstrates the needed image information on your sample, that evidence should carry more weight. A structured benchtop SEM model comparison can help organize these criteria before you select a system for further evaluation.
What safety, vacuum, or sample restrictions apply to a benchtop SEM demonstration?
Sample restrictions are conditions that determine whether a specimen can be mounted and imaged safely. For example, MIT DMSE Breakerspace requires SEM samples to be non-hazardous, dry unless intentionally frozen on an approved cold stage, firmly attached to a stub or approved holder, and free of loose particles. These are requirements at that facility, not a universal checklist for every instrument or laboratory. They illustrate why sample condition should be discussed before a demonstration.
A vacuum is a low-pressure environment inside the SEM’s sample chamber. Samples that release vapor or particles can interfere with chamber conditions and imaging, so dryness and secure mounting matter. MIT DMSE Breakerspace advises users to consult its staff before bringing wet, loose, reactive, biological, vacuum-sensitive, very magnetic, hazardous, or otherwise unusual samples. Before the session, clearly describe the specimen, including any condition that could affect handling.
Outgassing is the release of gas or vapor from a sample in a vacuum. Materials containing moisture, volatile substances, or trapped air may behave differently from stable, dry specimens. For example, a damp porous material can release vapor during evacuation, while a tightly sealed object may contain trapped gas. Describe the material and its condition accurately, rather than relying on its external appearance.
A sample stub is a small support that secures a specimen for SEM imaging. Firm attachment helps prevent movement during loading and observation. Loose particles can detach and contaminate the chamber or specimen, so remove debris only with a preparation method suited to the material. Do not bring unsecured powder or fragments as though they were stable, mounted samples.
An approved holder is a fixture designed to support a sample in the microscope chamber. Compatibility depends on the instrument and specimen geometry, so describe unusual shapes, mounting points, and dimensions before the demonstration. For example, a long, narrow component may need a different mounting approach from a flat coupon. Clear information helps keep the session focused on imaging rather than avoidable fit problems.
A cold stage is a temperature-controlled sample support for specimens intentionally kept frozen. MIT DMSE Breakerspace allows wet samples only when they are intentionally frozen on an approved cold stage. This exception does not mean an ordinary wet sample is ready for imaging. If your specimen requires cooling, explain its condition and handling needs before bringing it into the lab.
Use this preparation sequence to identify potential restrictions:
- Describe the sample’s material, physical condition, and intended imaging purpose.
- Identify moisture, loose particles, biological content, magnetic properties, reactivity, or vacuum sensitivity.
- Explain how the sample will be mounted, including whether it fits a stub or approved holder.
- Raise unusual handling requirements before the demonstration, following MIT DMSE Breakerspace’s guidance.
Vacuum mode also affects image quality. Low-vacuum imaging is a non-destructive option for non-conductive samples, though it generally produces lower resolution than high-vacuum imaging. Discuss whether the sample’s conductivity and preservation needs make this mode relevant. For example, a fragile insulating specimen may call for a different evaluation than a conductive metal fragment. The most useful demonstration reflects the sample condition and imaging approach relevant to your analytical question.
Prepare a sample description and disclose handling concerns before scheduling the demonstration. Arrange a benchtop SEM demonstration to evaluate how your sample requirements fit the imaging workflow.
The cold-stage exception concerns how a sample may be presented; it does not change what the microscope can show. The MIT DMSE Breakerspace SEMs mainly show sample surfaces and cannot see through opaque samples unless a cross section is exposed. A demonstration is therefore best suited to questions about a visible surface, not to revealing the inside of an intact opaque object.
If the feature of interest is internal, explain that before the session and ask whether an exposed cross section is suitable for the demonstration. Describe the specimen’s shape, condition, and mounting requirements clearly, since the exposed section must also be supported in a way compatible with the instrument. For a surface question, identify the area of interest and ensure it can be presented securely. Setting expectations about what is exposed helps align the demonstration with the specimen and the observation you need.
Electron Optics Instruments: Cube II Benchtop SEM
Electron Optics Instruments offers the Cube II Benchtop SEM for evaluation against your sample and imaging requirements. Use the demonstration criteria to assess whether its benchtop format and capabilities suit your lab’s workflow, specimen types, and installation space.
For a comparison across benchtop and tabletop systems, Electron Optics Instruments also offers the Genesis Tabletop SEM, Veritas Series SEM, and Veritas Plus SEM. Focus the discussion on the tasks your lab needs to perform, the images required, and practical installation conditions. This keeps the next step grounded in application fit rather than a general feature comparison.
Contact Electron Optics Instruments to discuss the Cube II Benchtop SEM and your evaluation requirements, or visit eoillc.com.
Turn Your Evaluation Into a Practical Next Step
Choosing a benchtop SEM can shape how your lab plans future inspection and analysis workflows. Treat the demonstration as the start of that planning process: define what evidence would make a system suitable for your work, then use those criteria to guide the next discussion. Knowing how to get a demo of a benchtop SEM helps connect instrument evaluation with the requirements your team will use every day.
Electron Optics Instruments offers the Cube II Benchtop SEM, Genesis Tabletop SEM, and Veritas Series SEM. If you’re ready to discuss which system aligns with your application and lab plans, contact Electron Optics Instruments. A focused conversation can help move your evaluation toward a well-informed decision.
Frequently Asked Questions
How do I request a benchtop SEM demo from a manufacturer or local distributor?
To arrange a benchtop SEM demo, contact Electron Optics Instruments with your application and evaluation goals. Identify the material you analyze, the image details you need, and the decision the demonstration should support. For example, a failure-analysis team might describe the defect it needs to document. Ask to evaluate a representative specimen and discuss the Cube II Benchtop SEM as a candidate system.
Can I book an in-person benchtop SEM demo near me?
Contact Electron Optics Instruments to discuss an in-person demonstration and include your location and preferred setting in your request. Explain whether you want to evaluate samples at your facility or attend a demonstration elsewhere. When traveling to evaluate equipment at central European testing facilities, booking reliable transfer options such as Prague Airport Chauffeur can help streamline travel between airports and research sites. If your lab has access constraints, such as limited bench space or controlled sample handling, mention them early. This context helps shape a practical session around your team’s evaluation needs.
What information should I provide when requesting a benchtop SEM demonstration?
Provide your application, sample material, approximate specimen dimensions, and the image or analysis outcome you need. Include the number and type of samples, any preparation already completed, and relevant constraints such as fragile surfaces or limited material. A reference image or a short description of a known defect can help focus the session. Identify who will attend and what decision the demonstration should inform.
What samples can I bring to a benchtop SEM demo, and how should they be prepared?
Choose specimens that represent your routine work, along with an example that tests a specific imaging need. Send a sample inventory beforehand, noting each specimen’s material, dimensions, condition, and mounting method. Include a photograph when shape or surface features are difficult to describe. If your workflow uses different sample forms, include them rather than preparing every specimen identically. This lets the demonstration show how preparation choices affect evaluation of your actual samples.
Can I request a remote or virtual benchtop SEM demo?
Request a remote demonstration from Electron Optics Instruments and outline what you need to see on screen. Specify whether you want a live sample-imaging walkthrough, an explanation of controls, or a review of images for a particular application. Send your questions and sample context beforehand so the session can address your workflow. A remote format can support an initial evaluation before your team plans its next steps.
What questions should I ask during a benchtop SEM demo about resolution, magnification, and detectors?
Ask whether the demonstrated image resolves the smallest feature relevant to your work, and how magnification affects useful detail. For the Cube II SEM, Electron Optics Instruments lists 5 nm resolution and magnification up to 300,000×. Ask which detector produced each image and what information it captures. If elemental analysis matters, discuss EDS as a separate requirement, then relate the demonstrated results to your application.