The integrity of a scanning electron microscopy image is not determined at the detector; it’s established during the meticulous, often volatile transition from a hydrated biological state to the vacuum-stable environment of the specimen chamber. For researchers aiming for nanometer-scale precision, biological sample preparation for sem represents the most critical bottleneck in the imaging workflow. You’ve likely encountered the persistent frustration of sample shrinkage, charging effects, or the loss of delicate surface features that occur when traditional fixation protocols fail to preserve ultrastructural reality.
This technical guide provides the rigorous framework required to achieve crisp, high-contrast images with zero artifacts through reproducible preparation workflows. You’ll master the protocols necessary to ensure your specimens are compatible with advanced EDS elemental analysis while maintaining structural fidelity. We’ll examine the latest 2026 industry standards, including the enquiry of ISO/DIS 16887, and the shift toward automated specimen processors that are currently defining the 3.5 billion dollar sample preparation market. By refining these methodologies, you can fully leverage the capabilities of high-end hardware like the Veritas Ultra SEM to produce data that meets the highest international standards of accuracy and reliability.
Key Takeaways
- Establish a rigorous foundation for ultrastructural preservation by navigating the specific requirements of primary and secondary chemical fixation protocols.
- Evaluate the technical advantages of Critical Point Drying versus HMDS methodologies to eliminate structural distortion during biological sample preparation for sem.
- Diagnose and mitigate the root causes of specimen charging and volumetric collapse to ensure the production of artifact-free, high-contrast imagery.
- Optimize analytical efficiency by integrating low-vacuum imaging and EDS capabilities on advanced platforms such as the Cube II benchtop SEM.
- Align laboratory workflows with the latest 2026 ISO standards to ensure the reproducibility and international credibility of your microscopic data.
The Fundamental Challenges of Biological Specimen Integrity in SEM
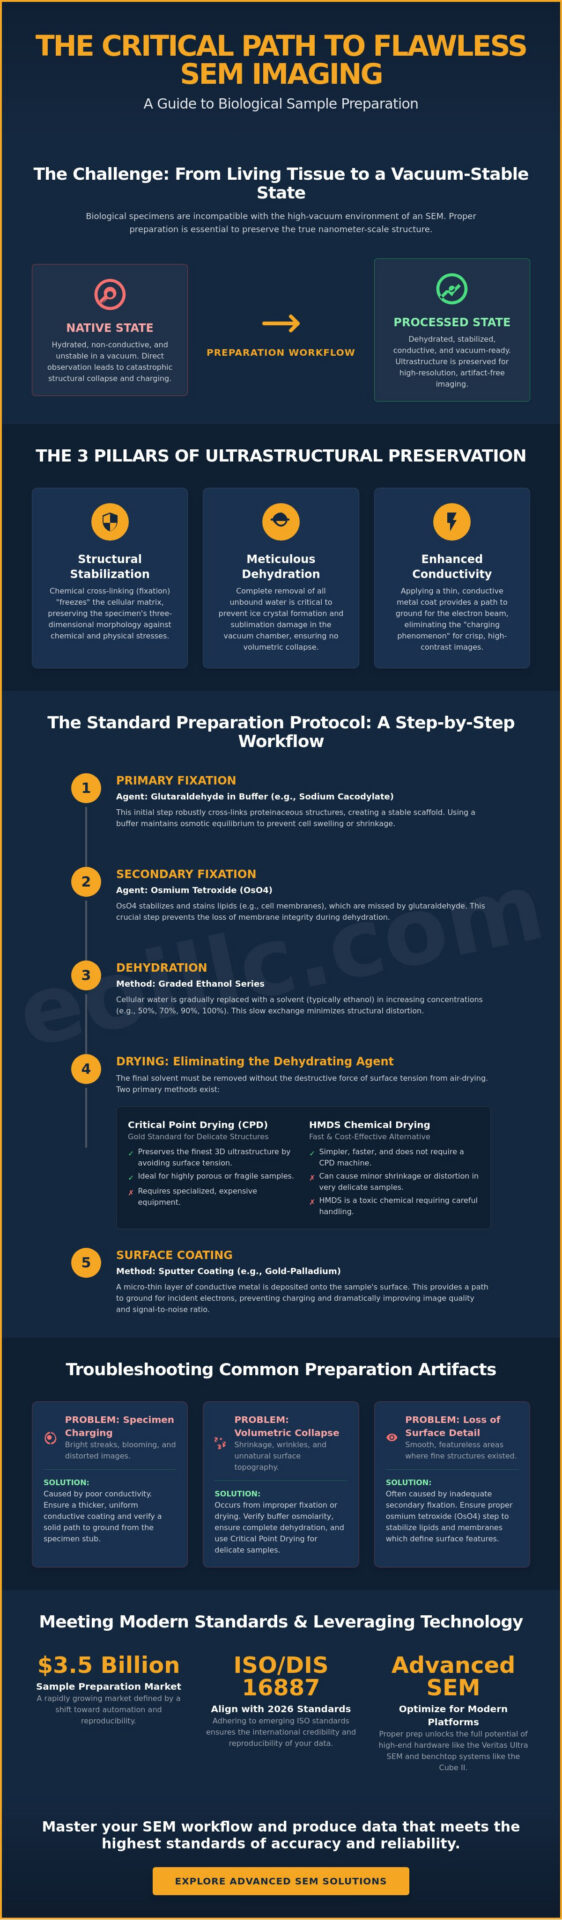
The fundamental challenge of biological imaging within a Scanning Electron Microscope lies in the inherent incompatibility between life’s aqueous nature and the rigorous demands of a high-vacuum environment. Biological specimens are predominantly composed of water and volatile organic compounds, which, if introduced directly into a vacuum chamber, undergo rapid sublimation. This phase change results in catastrophic structural deformation. Consequently, the primary objective of biological sample preparation for sem is the precise engineering of a specimen that maintains its three-dimensional morphology while becoming entirely vacuum-stable and electrically conductive.
Achieving this stability requires a multi-faceted approach centered on three critical pillars: structural stabilization through chemical cross-linking, meticulous dehydration to remove all unbound water, and the enhancement of surface conductivity. The ultimate metric of success in this process is the preservation of the specimen’s ultrastructure. This term refers to the intricate cellular architecture and surface features that remain invisible to light microscopy. When incident electrons strike non-conductive biological polymers, they often induce thermal damage or ionization, making the stabilization of these delicate matrices a prerequisite for high-resolution analysis. Without this rigorous groundwork, even the most advanced hardware cannot overcome the limitations of a poorly prepared specimen.
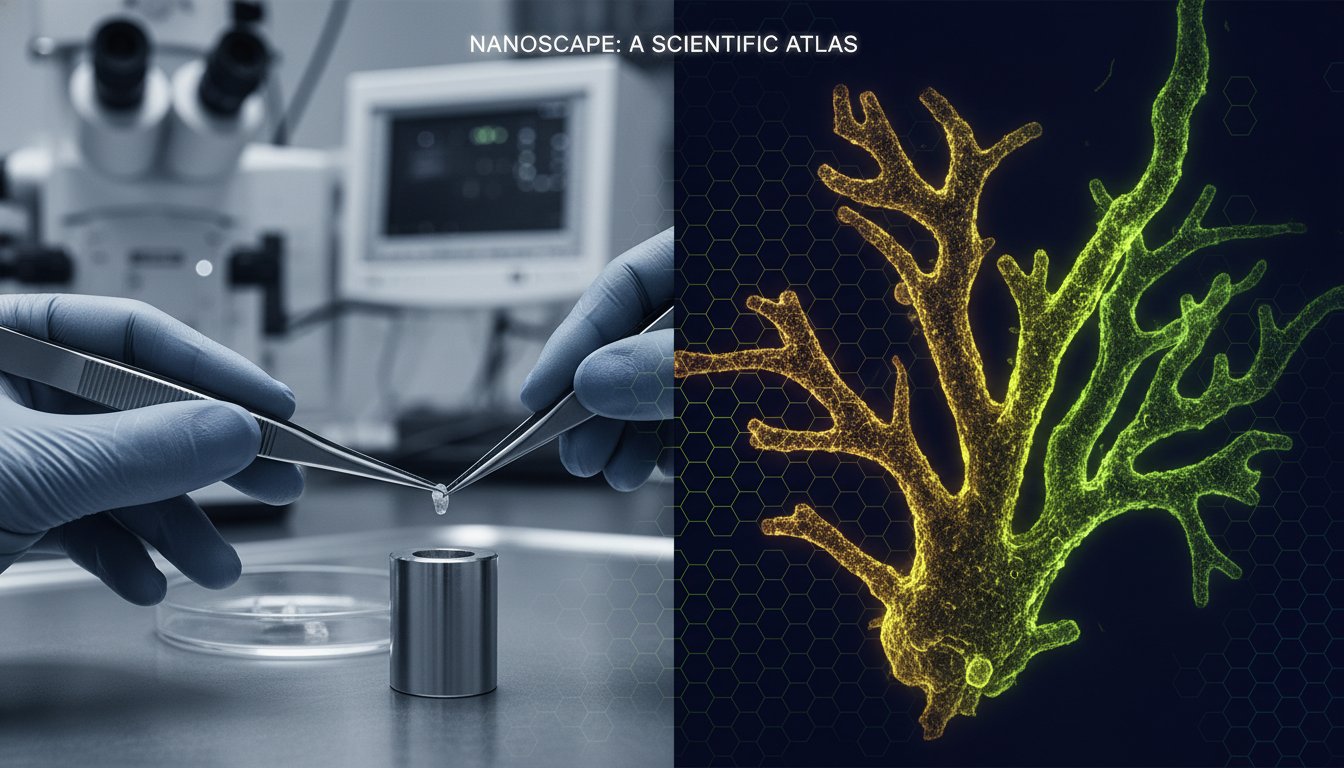
The Impact of High Vacuum on Hydrated Tissues
In a standard SEM chamber, pressures are maintained at levels where liquid water cannot exist. Without rigorous biological sample preparation for sem, cellular fluids evaporate instantly, leading to the total collapse of cell walls and the distortion of surface topography. To prevent this, technicians must replace cellular water with stable solids or gases through processes like critical point drying or chemical exchange. The native state represents the specimen in its original, hydrated biological context, whereas the processed state is the chemically stabilized and dried iteration engineered for vacuum compatibility.
Conductivity and the Charging Phenomenon
Biological tissues aren’t inherently conductive, meaning they lack a natural pathway to dissipate the electrical charge deposited by the primary electron beam. This lack of conductivity leads to the charging phenomenon, where excess electrons accumulate on the specimen surface. This accumulation creates a localized negative field that deflects the incident beam and distorts the resulting secondary electron signal, manifesting as bright streaks or blooming in the final image. Effective preparation facilitates a reliable path to ground, ensuring that hardware like the Veritas FE SEM can capture high-fidelity data without the interference of electrostatic artifacts.
The Standard Multi-Step Protocol for Chemical Fixation and Dehydration
The transition from a living, hydrated specimen to a vacuum-ready sample requires a methodical approach to chemical stabilization. This phase of biological sample preparation for sem begins with primary fixation, where glutaraldehyde serves as the foundational agent. As a dialdehyde, glutaraldehyde facilitates robust, bifunctional cross-linking of proteinaceous structures, effectively “freezing” the cellular matrix in place. To ensure the preservation of fine detail, technicians often utilize a simple, fast and inexpensive method involving buffer-optimized fixatives to maintain osmotic equilibrium. Using a buffer such as sodium cacodylate is essential; it resists pH changes and mimics the specimen’s internal environment to prevent cell swelling or shrinkage during the initial processing stages.
Protein and Lipid Stabilisation Strategies
While glutaraldehyde excels at protein immobilization, it often leaves lipids unstabilized, which can lead to the loss of membrane integrity during subsequent dehydration. Secondary fixation with osmium tetroxide (OsO4) addresses this vulnerability. OsO4 reacts with unsaturated fatty acids to form stable, black cyclic osmic acid esters. This process not only preserves the lipid bilayer but also acts as a conductive stain, enhancing the specimen’s inherent contrast under the electron beam. Due to the high volatility and toxicity of heavy metal oxides, technicians must conduct all OsO4 handling within a certified fume hood. For researchers requiring consistent results, utilizing high-purity specialized SEM consumables ensures that chemical interactions remain predictable and free from contamination.
Graded Solvent Exchange Procedures
Following fixation, the specimen remains saturated with water, which is immiscible with most drying agents and unstable in high-vacuum environments. A graded dehydration series is the standard protocol to remove water without inducing osmotic shock. This involves replacing the aqueous buffer with an organic solvent, typically ethanol or acetone, in a sequence of increasing concentrations. A common series includes 10-minute incubations at 50%, 70%, 90%, and 95%, culminating in three final changes of 100% anhydrous solvent.
- 50% to 70% Ethanol: Initial displacement of unbound water; safe for most resilient tissues.
- 90% to 95% Ethanol: Critical phase where remaining hydration shells are removed from macromolecules.
- 100% Anhydrous Ethanol: Multiple changes are mandatory to ensure a completely water-free environment before critical point drying.
Incubation times must be carefully calibrated. While a 1mm tissue block might require 15 minutes per step, larger or more dense specimens like botanical samples may need extended durations to ensure the solvent reaches the core. Failure to achieve absolute dehydration leads to residual water pockets that will boil in the vacuum, causing localized “explosions” that destroy the specimen’s ultrastructural detail. It’s a precise balance of chemistry and timing that defines successful biological sample preparation for sem.
Advanced Drying and Surface Coating Methodologies
After the solvent exchange described previously, the specimen must be transitioned to a dry state without the destructive effects of surface tension. In standard air-drying, the receding liquid interface exerts massive capillary forces that cause micro-ripping of biological membranes. To circumvent this, advanced biological sample preparation for sem utilizes Critical Point Drying (CPD). This process involves replacing the intermediate solvent with liquid CO2 and raising the temperature and pressure beyond the critical point, 31.1°C and 1072 psi, where the liquid and gas phases become indistinguishable. By transitioning directly from this supercritical phase to a gas, the specimen avoids the liquid-gas interface entirely, preserving three-dimensional ultrastructure with unparalleled fidelity.
Critical Point Drying vs. Hexamethyldisilazane (HMDS)
While CPD remains the gold standard for intricate botanical or zoological structures, Hexamethyldisilazane (HMDS) offers a robust alternative for high-throughput laboratory environments. HMDS works by cross-linking and lowering the surface tension of the final solvent, allowing it to evaporate with minimal structural damage. Research into a simplified SEM preparation protocol suggests that HMDS is particularly effective for tougher specimens or large batches where the time-intensive nature of CPD is prohibitive. However, for the most delicate membranes, the mechanical stability provided by supercritical CO2 is often necessary to prevent volumetric shrinkage. Successful biological sample preparation for sem requires selecting the drying method that best balances throughput with the fragility of the target tissue.
Sputter Coating and Conductive Layer Selection
Once dry, the specimen requires a nanometer-scale conductive path to prevent the charging effects discussed in Section 1. Sputter coating deposits a thin layer of heavy metal onto the surface. The choice of coating material is dictated by the desired magnification and the nature of the research. Gold (Au) provides excellent secondary electron yield but can obscure fine details at ultra-high magnifications due to its grain size. For these applications, Gold-Palladium (Au-Pd) or Platinum (Pt) are preferred for their finer grain structure. If the objective includes EDS elemental analysis, carbon (C) is often the optimal choice to avoid X-ray interference from metal peaks.
Proper mounting is the final step in ensuring a stable signal. Technicians utilize conductive carbon tape or silver paint to secure the specimen to an aluminum stub, ensuring a direct electrical path from the coating to the ground. For more on high-resolution imaging, see our guide on advanced SEM techniques. Aiming for a coating thickness between 1nm and 10nm is essential; too thin, and the sample will charge; too thick, and you risk masking the very surface details you sought to preserve.
Troubleshooting Common Preparation Artifacts in High-Resolution Imaging
The transition from the preparation lab to the imaging suite often reveals subtle discrepancies that compromise the integrity of the secondary electron signal. Even when following a rigorous protocol for biological sample preparation for sem, artifacts can manifest as a result of minute deviations in chemical concentrations or drying durations. Distinguishing between genuine biological features and preparation-induced anomalies is a critical skill for any microscopist. These artifacts typically fall into three categories: electrostatic charging, structural distortion, and surface contamination. Addressing these requires a methodical diagnostic approach that traces each visual defect back to a specific phase of the preparation workflow.
Visual Identification of Preparation Errors
Identifying the root cause of a failed image requires an understanding of how preparation errors manifest at the nanoscale. Charging, for instance, is often misidentified as beam damage. While beam damage involves localized melting or hole formation due to excessive energy deposition, charging presents as bright, uncontrollable streaks or image shifts. If you observe “cracks” in the metal coating, this usually indicates that the specimen underwent late-stage volumetric shrinkage after sputter coating was complete, often due to residual internal moisture. Salt precipitates typically manifest as high-contrast, sharply faceted geometric structures that deviate fundamentally from the organic, curvilinear topography of the specimen surface. These crystals are a direct consequence of inadequate rinsing following buffer incubation, where residual salts crystallize during the dehydration or drying stages.
Optimising Sample Orientation and Mounting
Stability in the vacuum chamber is as much about mechanical mounting as it is about chemical fixation. For non-standard biological shapes like insects, seeds, or fibers, standard carbon tape might not provide a sufficient pathway for electrons to reach the ground. In these instances, “silver painting” is mandatory. Applying a small amount of conductive silver paint from the edge of the specimen to the aluminum stub creates a robust bridge for incident electrons. It’s essential to allow these adhesives to cure completely; uncured solvents contribute to hydrocarbon buildup and outgassing, which degrades the vacuum and leads to rapid contamination of the final image. For comprehensive chamber loading best practices, refer to our SEM operation guide.
Maintaining a clean imaging environment is a continuous process that extends beyond the initial preparation. To ensure your hardware remains at peak performance, consider scheduling preventative maintenance visits to address potential hydrocarbon accumulation and filament wear. By combining meticulous biological sample preparation for sem with disciplined instrument care, you ensure that every captured frame represents the true ultrastructure of the specimen rather than a collection of laboratory artifacts.
Optimising Biological Workflows for Benchtop SEM and EDS Analysis
The evolution of hardware in 2026 has significantly altered the traditional timelines associated with biological sample preparation for sem. High-performance benchtop systems, such as the Cube II Benchtop SEM, have bridged the gap between rapid screening and high-resolution research. These instruments often feature Variable Pressure (VP) or low-vacuum modes, which allow for the imaging of biological specimens with minimal preparation. By introducing a controlled amount of air or water vapor into the chamber, the system neutralizes surface charging on non-conductive tissues. This capability allows researchers to bypass the sputter coating stage in specific applications, which drastically reduces the time from specimen collection to data acquisition.
Benchtop SEM Capabilities for Biological Matter
Modern desktop SEM systems aren’t merely scaled-down versions of floor-standing units; they’re specialized platforms engineered for efficiency. While the rigorous protocols of fixation and dehydration discussed in previous sections remain the standard for ultrastructural integrity, benchtop systems like the Genesis Tabletop SEM excel in high-throughput environments. The integration of automated vacuum sequences and intuitive software allows for a streamlined workflow where a fresh specimen can be processed and imaged in under four hours. This speed is particularly advantageous in industrial pathology and agricultural research, where rapid decision-making is paramount and the volume of samples requires a methodical, time-sensitive approach.
EDS Compatibility in Prepared Specimens
Integrating imaging with chemical characterization requires a strategic shift in the final coating stages. While Section 3 highlighted the benefits of gold and platinum for secondary electron resolution, these heavy metals present significant challenges for EDS (Energy Dispersive Spectroscopy) Systems. The characteristic X-ray peaks of gold frequently overlap and obscure essential biological elemental peaks, such as phosphorus, sulfur, and calcium. This interference can lead to false positives or the total masking of trace elements within the tissue.
To achieve accurate elemental mapping, carbon coating is the mandatory alternative. Carbon’s low atomic number ensures that it doesn’t interfere with the detection of lighter elements within the tissue matrix. This choice is critical when correlating ultrastructural morphology with chemical composition, such as identifying mineral deposits in botanical samples or heavy metal uptake in environmental bio-indicators. By utilizing carbon-coated samples within a Veritas Ultra SEM or a Cube II equipped with integrated EDS, researchers can achieve a comprehensive understanding of both form and function. This synergy between meticulous biological sample preparation for sem and advanced analytical hardware defines the current standard of excellence in the life sciences.
Advancing Ultrastructural Research Through Methodological Precision
Achieving nanometer-scale resolution in the life sciences requires a seamless integration of chemical expertise and advanced hardware capabilities. By mastering the intricate protocols of protein stabilization and supercritical drying, researchers effectively bridge the gap between a living specimen and the vacuum-stable environment of the electron microscope. These rigorous workflows ensure that the resulting imagery reflects true biological ultrastructure rather than laboratory-induced artifacts. Refining your approach to biological sample preparation for sem is a fundamental investment in the long-term reliability and international credibility of your microscopic data.
As the sole US distributor for EmCraft Scanning Electron Microscopes, we provide the specialized tools and technical support necessary to maintain these high standards of precision. With over 30 years of electron optics expertise, our team offers comprehensive on-site technical training and service contracts to ensure your laboratory remains at the forefront of innovation. We invite you to explore the Cube II Benchtop SEM for your biological research needs and discover how our commitment to technical excellence can transform your imaging outcomes. Elevate your research capabilities with a partner dedicated to the future of microscopic discovery and industrial excellence.
Frequently Asked Questions
Why is chemical fixation necessary for biological SEM samples?
Chemical fixation is essential because it stabilizes the protein and lipid matrix of the specimen to prevent catastrophic structural collapse. Fixatives like glutaraldehyde create robust covalent cross-links that effectively “freeze” the cellular architecture in place. This stabilization ensures the specimen remains resilient during the subsequent dehydration and high-vacuum stages without losing its original morphology.
Can I image biological samples in SEM without sputter coating?
It’s possible to image biological samples without sputter coating by utilizing Variable Pressure or low-vacuum modes available on systems like the Cube II Benchtop SEM. These modes introduce a controlled gas environment into the chamber to dissipate surface charge. While this is effective for rapid screening, high-resolution imaging at high vacuum still requires a conductive coating to prevent charging artifacts.
What is the difference between Critical Point Drying and air drying?
Critical Point Drying bypasses the liquid-gas phase boundary by using supercritical CO2, which eliminates the surface tension that causes micro-ripping of membranes. Air drying allows a receding liquid interface to exert massive capillary forces on delicate structures. This physical stress often leads to the total collapse of cellular features during biological sample preparation for sem.
How does osmium tetroxide improve SEM image quality?
Osmium tetroxide stabilizes lipid bilayers while simultaneously acting as a heavy metal stain that increases secondary electron yield. By binding to unsaturated fatty acids, it provides structural rigidity and significantly enhances topographic contrast. This dual role results in sharper images with greater depth of field and a reduced susceptibility to beam-induced damage.
What are the most common artifacts in biological SEM preparation?
The most frequent anomalies include electrostatic charging, volumetric shrinkage, and salt crystallization. Charging typically appears as uncontrollable bright streaks due to poor surface conductivity. Shrinkage is a direct result of incomplete dehydration, while salt crystals manifest as geometric structures when buffer residues aren’t properly rinsed before the solvent exchange process.
How long does a typical biological sample preparation take?
A standard protocol usually spans 24 to 48 hours, depending on the specimen’s specific porosity and thickness. Chemical fixation and graded dehydration sequences require several hours of incubation to ensure deep tissue penetration. However, certain streamlined workflows for benchtop SEM applications can reduce the total processing time to under four hours for less complex specimens.
Is a benchtop SEM powerful enough for biological ultrastructure research?
Modern systems like the Cube II provide the resolution and analytical capabilities necessary for detailed cellular and tissue studies. While specialized field emission systems like the Veritas FE SEM offer the ultimate in nanometer-scale resolution, current benchtop technology handles traditional biological sample preparation for sem with high fidelity. They’re increasingly utilized for both rapid screening and complex morphological analysis.
Which coating material is best for biological EDS analysis?
Carbon is the optimal coating material for Energy Dispersive Spectroscopy because its low atomic number doesn’t interfere with biological elemental peaks. Heavy metals like gold or platinum have characteristic X-ray lines that frequently overlap with phosphorus, sulfur, and calcium. Utilizing carbon ensures accurate elemental mapping and reliable quantitative analysis of the specimen’s chemical composition.