
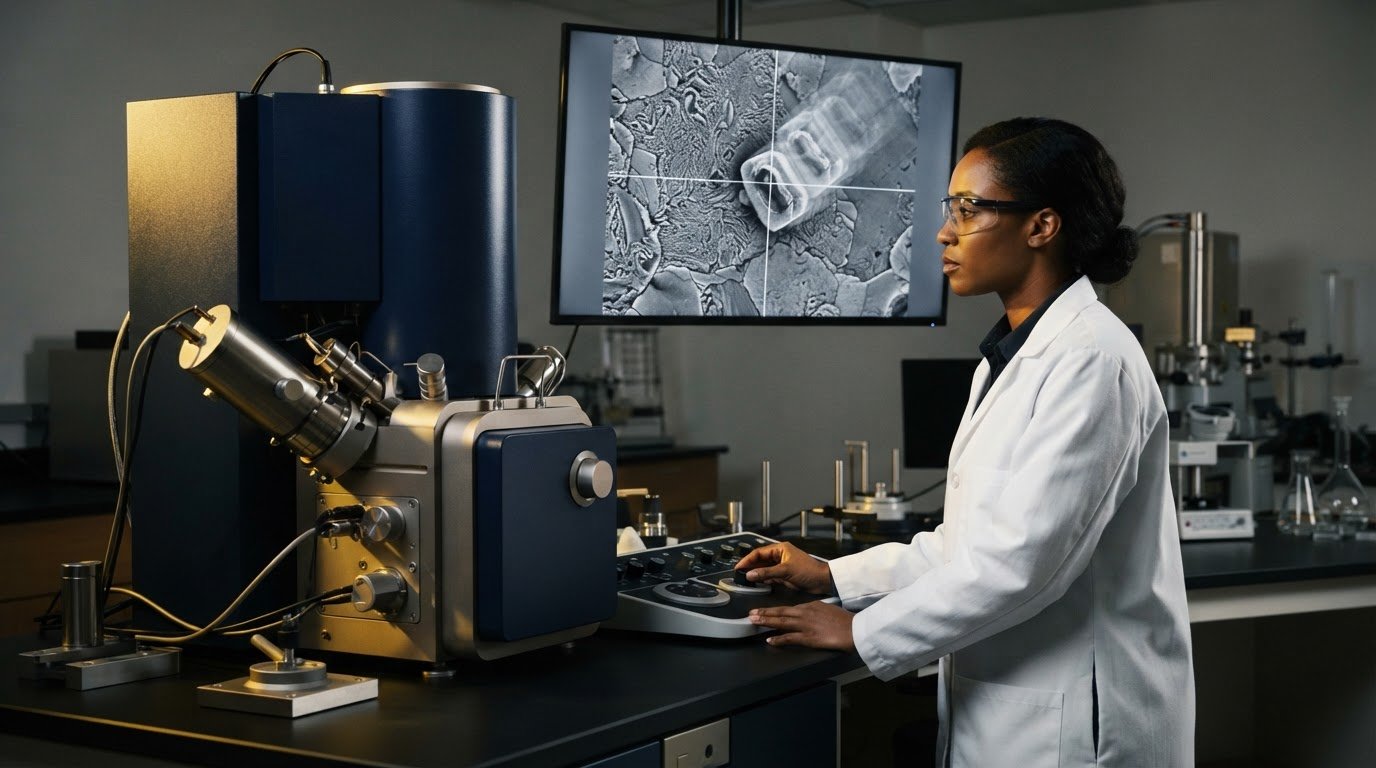
What if the SEM image is moving, but the specimen isn’t? A shifting feature can point to sample motion, stage instability, beam movement, or changing environmental conditions. Charging and scan distortion can also make an image appear to move, so changing several settings at once may hide the real cause. If you’re asking what causes image drift in sem, start by separating actual movement from image artifacts through controlled checks.
Drift can undermine repeatable measurements, especially when its source isn’t obvious. This guide explains how to compare image behavior under controlled conditions, distinguish specimen, stage, beam, and environmental instability from charging or scan-related artifacts, and record useful symptoms as you troubleshoot. It also covers when recurring drift warrants review by a qualified SEM support professional. A methodical diagnosis turns an uncertain image shift into evidence you can use to decide what to check next.
Key Takeaways
- Learn what causes image drift in sem by comparing specimen, stage, beam, and environmental factors.
- Use the pattern of image movement to distinguish possible drift from charging, scan distortion, or unstable contrast.
- Follow a controlled troubleshooting sequence, documenting symptoms and changing one factor at a time.
- Recognize when recurring drift needs qualified SEM support, and what information to record before seeking help.
What Causes Image Drift in SEM, and What Does It Look Like?
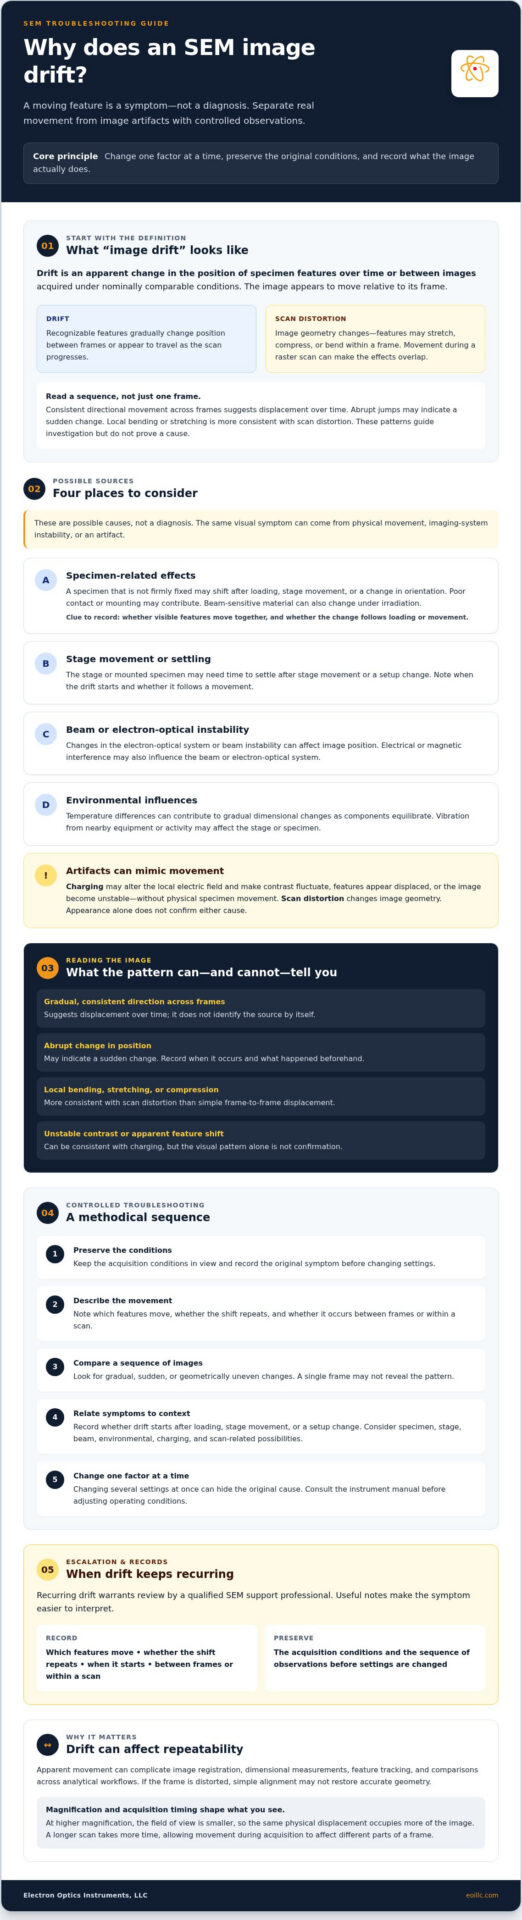
SEM image drift is an apparent change in the position of specimen features over time or between images acquired under nominally comparable conditions. The image appears to move relative to the frame. Drift differs from scan distortion, which changes image geometry, such as by stretching, compressing, or bending features within a frame. Movement during a raster scan can produce distortion too, so the effects may overlap.
Understanding how a Scanning electron microscope (SEM) forms an image helps explain why a shifting feature doesn’t identify its own cause. The same visual symptom may arise from specimen movement or charging, stage instability, changes in the electron-optical system, or environmental conditions. Treat the image as evidence to interpret, not as a diagnosis.
How SEM image drift appears during observation
Look for recognizable features that gradually change position between successive frames or appear to travel as the scan progresses. Consistent directional movement across several frames suggests displacement over time. Abrupt jumps may indicate a sudden change, while local bending or stretching within a frame is more consistent with scan distortion. These patterns help guide further checks but don’t prove a specific cause.
Magnification and acquisition timing affect what you see. At higher magnification, the field of view is smaller, so the same physical displacement occupies more of the image. A longer scan also takes more time, allowing movement during acquisition to affect different parts of a frame. Compare a sequence of images rather than relying on one frame to see whether the pattern is gradual, sudden, or geometrically uneven.
Why identifying the cause matters
Even modest apparent movement can complicate image registration, dimensional measurements, feature tracking, and comparisons across analytical workflows. If a feature shifts between frames, software may struggle to align the images reliably. If the frame itself is distorted, simple alignment may not restore accurate geometry. Measurements made without accounting for these effects can be difficult to reproduce.
To investigate what causes image drift in sem, preserve the acquisition conditions and record what changes: which features move, whether the shift repeats, and whether it occurs between frames or within a scan. Changing several settings at once can erase clues about the original symptom. Initial observations narrow the possibilities but don’t establish that a component has failed. Confirm patterns through controlled checks, and consult the instrument manual before adjusting operating conditions.
How Specimen, Stage, Beam, and Environment Create SEM Image Drift
SEM image drift can arise from several parts of the imaging system, not just a moving specimen. Common categories include specimen-related effects, stage movement, electron-beam or electron-optical instability, and environmental influences such as temperature change, vibration, or electrical and magnetic interference. These are possible causes, not a diagnosis. The observed pattern and controlled checks help determine which explanation is worth investigating.
Specimen-related movement, charging, and contamination
A specimen that isn’t firmly fixed to its mount may shift after loading, stage movement, or a change in orientation. This can make all visible features move together. Poor contact or an unsuitable mounting approach may contribute, but the right preparation depends on the specimen and instrument. Follow established laboratory procedures and the SEM manual.
Charging can produce a similar visual symptom without physical movement. On a nonconductive or poorly grounded specimen, accumulated charge may alter the local electric field and affect how the beam interacts with the surface. Contrast may fluctuate, features may appear displaced, or the image may become unstable. Beam-sensitive materials can also change under irradiation, so apparent movement may reflect an evolving specimen rather than stage motion. Neither pattern alone confirms charging or beam damage.
Consider contamination or outgassing only when the specimen, preparation materials, or observed conditions make them plausible. Don’t change preparation or vacuum procedures based on appearance alone. Check the instrument guidance for appropriate handling.
Instrument and environmental sources of apparent drift
After stage movement or a setup change, the stage or mounted specimen may need time to settle. Temperature differences between the instrument, specimen, and surrounding room can also contribute to gradual dimensional changes as components equilibrate. Record when drift starts, including whether it follows loading or movement, to help distinguish these possibilities from persistent instability.
Vibration from nearby equipment or activity may affect the stage or specimen, while electrical or magnetic interference can influence the electron beam or electron-optical system. Beam instability is another instrument-side possibility. These factors depend on the environment, and a shifting image doesn’t establish that the beam, stage, or another component has failed. Use only manufacturer-approved checks and settings. Don’t open or adjust instrument components unless the manual and your role authorize it.
If drift continues under controlled conditions, record the image sequence, operating conditions, recent changes, and checks already performed before seeking qualified support. Electron Optics Instruments provides maintenance and repair support for electron microscopes from major manufacturers. Learn more about its SEM maintenance and repair support if the issue persists.
How to Tell Which SEM Image-Drift Cause Fits the Symptoms
Use the image pattern to choose the next check, not to declare a diagnosis. Compare successive frames acquired with the same settings. Note whether movement affects the entire field, appears in only part of it, or changes over time. Similar shifts can have different causes, so let each pattern guide a controlled test.
| Observed pattern | Plausible source | Safe next check |
|---|---|---|
| Gradual movement in one direction across the field | Specimen or stage settling, thermal change, or instrument stability | Compare another frame under unchanged conditions; record time since stage movement or setup. |
| A sudden whole-field jump | Mechanical disturbance, stage movement, or a change in operating conditions | Check whether the jump coincides with an action or external disturbance. |
| Local bending, stretching, or shape changes within a frame | Scan-related distortion or specimen charging | Compare repeated scans and assess whether the pattern changes with acquisition conditions, using manual-approved settings. |
| Unstable contrast or apparent feature movement | Charging, beam-sensitive specimen behavior, or changing imaging conditions | Observe whether contrast and feature position change together across successive frames. |
Does the whole field move or only part of the image?
If recognizable features across the whole field shift together, investigate specimen, stage, and overall instrument stability first. This pattern doesn’t distinguish among them, but it helps prioritize checks. If only a region changes shape or position, interpret the image cautiously: charging or scan-related effects may be involved, and the specimen itself may be changing. Compare successive frames without changing acquisition conditions before drawing conclusions.
Does drift change with time, magnification, or operating conditions?
Record whether movement begins after stage motion, specimen loading, a setup change, or a settling period. Note magnification and scan conditions too, since they affect the field of view and the time represented by each frame. Compare observations at controlled settings, changing only one factor at a time. No single setting identifies the cause on its own.
This symptom-based approach helps narrow what causes image drift in sem, but patterns suggest tests rather than confirm a failed component. Consult a qualified SEM imaging best-practices resource alongside the instrument manual for broader image-quality guidance. Document the conditions and repeatability of each observation so subsequent checks build on evidence rather than guesswork.
How to Troubleshoot SEM Image Drift Without Changing Too Many Variables
A disciplined troubleshooting sequence preserves evidence. Before adjusting settings, confirm that the movement is repeatable and record the conditions under which it occurs. This helps you investigate what causes image drift in sem without masking the original symptom through simultaneous changes.
- Document the observation. Save representative images and note the magnification, accelerating voltage, scan conditions, stage position, and timing. Record whether drift begins after specimen loading, stage movement, or another setup change.
- Confirm repeatability. Acquire another image under the same conditions and compare the same recognizable features. Follow the settling period specified in the instrument documentation rather than assuming a universal wait time.
- Review basic, non-invasive factors. Using approved operating procedures, check that the specimen is mounted securely and grounded as intended, and review chamber conditions indicated by the instrument. Don’t open the chamber or alter components outside documented procedures.
- Test one suspected factor at a time. Make a controlled comparison, such as checking whether the pattern changes after stage motion has stopped, while keeping other acquisition conditions unchanged. Record the factor changed and the result.
- Escalate if the pattern persists. If approved operator checks don’t resolve recurring drift, preserve the records and seek qualified support rather than attempting internal adjustments or undocumented calibration changes.
Keep each comparison controlled
For example, if drift appears after stage movement, repeat the observation without making additional scan or imaging changes. If the symptom varies with scan conditions, test only one manufacturer-approved setting at a time. This approach won’t prove a particular component is at fault, but it can help distinguish specimen behavior from stage, scan, or broader instrument instability.
Use the SEM’s specific manual as the authority for operating limits, settling guidance, grounding procedures, and permitted adjustments. A general SEM operation guide can provide broader context, but it shouldn’t replace instrument-specific instructions. Avoid actions that require service-level access, and don’t change several variables together.
Diagnostic sequence: document the symptom, confirm repeatability, review approved basic checks, test one factor at a time, and escalate persistent drift with the evidence recorded. This process narrows possibilities but doesn’t guarantee a fix. For recurring drift that remains unresolved, review Electron Optics Instruments’ SEM repair support.
When Persistent SEM Image Drift Calls for Expert Service
Operator checks should give way to qualified support when drift continues across repeated observations, controlled conditions, and the low-risk checks permitted by the instrument manual. Escalation is also appropriate if the symptom is worsening, appears alongside other instrument behavior, or would require internal access, calibration changes, or procedures you aren’t authorized to perform. The question of what causes image drift in sem may remain open, but you don’t need to identify a failed component before requesting guidance.
Keep the distinction clear: operators can document when and how the image changes, while diagnosing or correcting an instrument-side fault may require qualified service personnel or manufacturer guidance. Don’t treat a symptom pattern as proof of a specific failure.
What to document before requesting technical support
A concise record helps support personnel assess the problem and determine appropriate next steps. Include:
- Representative image sequences, with notes on how feature displacement changes over time.
- The instrument model and relevant operating conditions, including magnification, accelerating voltage, scan conditions, and stage position.
- Stage actions, specimen loading or setup changes, and when drift begins or recurs.
- Recent maintenance, relocation, or other changes that could provide useful context.
- Checks already performed and their results, described as observations rather than confirmed causes.
Preserve the original images and notes when possible. For example, report that contrast became unstable after a particular setup change rather than stating that a specific component failed. This gives the support team usable evidence without narrowing the investigation prematurely.
How experienced SEM support can help
When documented, approved checks haven’t resolved recurring drift, qualified technicians can evaluate whether the symptoms warrant further instrument-side assessment and recommend an appropriate next step. Electron Optics Instruments provides maintenance and repair support for electron microscopes from major manufacturers, as well as on-site SEM training. Support scope can depend on the instrument, so confirm that the model and issue fall within available coverage.
Electron Optics Instruments brings more than 30 years of industry experience to its work with electron microscopes. If drift persists, share your records with the team to discuss possible support options. Review SEM service and support options.
Make Your Next SEM Image More Repeatable
Understanding what causes image drift in sem starts with treating movement as a symptom to investigate, not proof of a particular failure. Specimen behavior, stage settling, beam or electron-optical instability, and environmental conditions can produce overlapping patterns. Compare repeat images under controlled conditions, record what changes, and adjust one factor at a time while following the instrument manual.
If drift persists after appropriate operator checks, clear documentation can help qualified support assess the situation. Electron Optics Instruments provides SEM maintenance, repair, and on-site training, with support for electron microscopes from major manufacturers. Confirm model-specific service coverage.
Discuss persistent SEM image drift with Electron Optics Instruments. A methodical diagnosis gives you a stronger basis for reliable imaging and repeatable analysis, while qualified support can help clarify the next step.
Frequently Asked Questions
What is the most common cause of image drift in an SEM?
Thermal drift and sample charging are common causes, but the likely source depends on the specimen, instrument, and operating conditions. Temperature changes can cause gradual movement as components equilibrate, while charging can make features appear unstable, particularly on nonconductive samples. Stage settling, vibration, and beam instability are other possibilities. Treat these as starting points for controlled checks, not proof of a specific fault.
Can specimen charging cause image drift in SEM?
Yes. Charge accumulating on a specimen can alter the local electric field and affect the electron beam, causing unstable contrast or apparent feature movement without the specimen physically shifting. Nonconductive or poorly grounded samples may be more susceptible. Compare successive frames and note whether contrast changes along with feature position. These symptoms can suggest charging but don’t confirm it. Follow the instrument manual when reviewing preparation or grounding.
How do I distinguish stage drift from specimen charging?
Stage or specimen movement may appear as a coordinated shift of recognizable features across the whole field. Charging may also move or distort features, often alongside changing contrast or localized instability. These patterns overlap, so they can’t establish the cause on their own. Compare successive frames at unchanged acquisition conditions, record whether the effect repeats, and use only manual-approved checks to assess specimen mounting, grounding, and stage behavior.
Can vibration make an SEM image move?
Yes. Vibration from nearby equipment, foot traffic, or other environmental sources can disturb the specimen or stage and appear as image movement. The effect may be intermittent or coincide with activity in the surrounding area, though that timing alone doesn’t prove vibration is responsible. Record when the movement occurs and compare observations under otherwise unchanged conditions. Don’t adjust internal components to address suspected vibration without qualified guidance.
Does increasing magnification make image drift worse?
Increasing magnification doesn’t necessarily create more physical drift, but it can make a given displacement more noticeable because the field of view is smaller. At high magnification, a feature may move across more of the displayed image even if its physical movement hasn’t changed. Compare observations at controlled settings, and record both magnification and scan conditions. A change in apparent movement is a useful clue, not a diagnosis.
How can I reduce SEM image drift during imaging?
Start by confirming that the movement is repeatable and documenting magnification, scan conditions, stage position, and timing. Check sample mounting and grounding, and allow the instrument to settle for the period specified in its documentation. Keep conditions stable and change one factor at a time. Avoid undocumented calibration changes or internal adjustments. If the symptom persists despite approved checks, preserve representative images and consult qualified support.
When should I contact an SEM service technician about image drift?
Contact qualified support when drift recurs under controlled conditions despite documented, low-risk checks, or when further investigation would require internal access or calibration beyond your authorization. Provide image sequences, the instrument model, operating conditions, recent changes, and steps already attempted. Describe what you observed rather than naming an unconfirmed failed component. Confirm model-specific service coverage and follow manufacturer guidance while the issue is being assessed.