
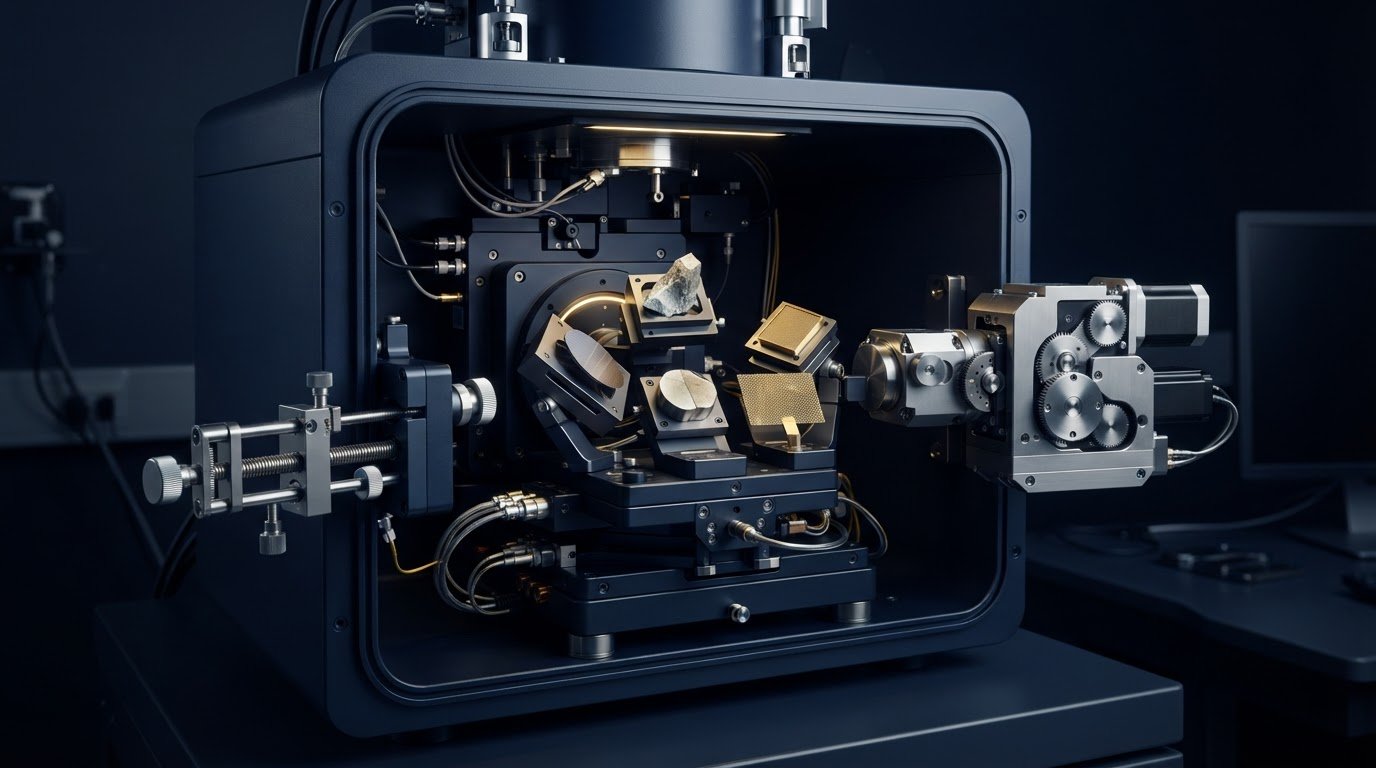
Choosing the right sem stage and holder options starts with the specimen and the view you need. The stage positions a mounted sample inside the SEM, while the holder supports and presents it. Together, they affect how securely a sample is mounted, which surface is accessible, and how the operator can position it for observation.
To narrow the options, consider sample geometry, the target viewing area, and how the sample needs to move during examination. This guide explains the separate roles of stages and holders, compares manual and motorized positioning, and outlines practical criteria for matching a setup to a workflow. EOI’s Genesis models provide a concrete example of stage differences: Genesis-1000 and Genesis-1100 have manual stages, while Genesis-2020 and Genesis-2120 have 5-axis motorized stages. Use those distinctions to think through positioning needs, then consider the holder and mounted sample as part of the same setup.
Key Takeaways
- Use sample dimensions, shape, and the surface you need to view to narrow suitable sem stage and holder options.
- Compare manual and motorized positioning according to the workflow’s need for direct or repeatable movements, not assumed image-quality differences.
- Decide whether a flat mounting orientation or an exposed edge best presents the specimen for observation.
- EOI’s Genesis models illustrate different positioning configurations that can help you relate stage choice to laboratory tasks.
SEM Stage and Holder Options: What Each Component Does
The stage and holder are connected parts of sample positioning, but they do different jobs. The stage positions the mounted sample inside the SEM for observation. The holder supports the specimen and presents it in the orientation needed for imaging. Keeping these roles distinct helps identify whether a setup challenge involves mounting the sample or moving it into position.
A useful distinction is simple: the holder supports and presents the specimen; the stage positions that mounted specimen for observation. This relationship is central to choosing sem stage and holder options. The Scanning Electron Microscope overview provides context on the sample chamber and specimen stage. The holder and stage work together, but they are not interchangeable: stage movement cannot correct a sample that is poorly supported or mounted with the target area obscured.
What does an SEM stage control?
The stage controls the sample’s position within the microscope so the operator can bring a region of interest into view and adjust its presentation. The available controls vary by SEM configuration. A manual stage is adjusted by the operator; a motorized stage uses powered positioning. These terms describe how positioning is controlled, while the model determines the stage’s specific capabilities. Choose according to how the sample needs to be explored and whether positions need to be revisited.
For example, an operator examining different areas by hand may prefer direct manual adjustment. A workflow that repeatedly returns to selected positions may benefit from motorized movement. These are workflow considerations, not claims about image quality. Think about the operator’s routine and the sample’s inspection needs when comparing stage configurations.
What does a specimen holder do?
The holder provides physical support for a specimen and presents the surface or feature of interest for imaging. Its suitability depends on the sample’s shape, how it can be mounted, and which region needs to remain accessible. A sample viewed across a level surface has different presentation needs from one whose edge or cross-section must be exposed. The holder affects sample stability and access, while the stage positions the mounted assembly in the microscope.
Consider a small fragment with an edge of interest. The holder needs to support the fragment while presenting that edge; the stage then positions the mounted sample for observation. Considering these steps separately helps avoid a common mismatch: focusing on stage movement before deciding whether the holder can secure and orient the specimen as required.
When planning a setup, consider the holder, mounted specimen, and stage as one arrangement. First decide how the sample must be mounted and presented. Then determine how the stage needs to position and orient it. This practical distinction helps you compare configurations against sample geometry and imaging goals.
Manual and Motorized SEM Stages: How Positioning Options Differ
Stage selection is primarily a workflow decision. The key question is not whether manual or motorized positioning produces better images, but how the operator needs to locate, revisit, and orient the sample during examination. A task involving hands-on exploration may suit direct operator adjustment. Work that requires recurring position changes may call for a motorized configuration. Match the stage to the laboratory’s routine rather than assuming one approach has a universal performance advantage.
A manual stage is adjusted directly by the operator; a motorized stage uses powered movement to position the sample. This describes the positioning method. The specific movements and controls depend on the SEM model.
| Consideration | Manual stage | Motorized stage |
|---|---|---|
| How positioning is adjusted | Operator-led adjustment | Powered positioning |
| Workflow consideration | Can suit tasks where direct operator adjustment is appropriate | Can suit tasks where positions need to be revisited |
| EOI examples | Genesis-1000 and Genesis-1100 | Genesis-2020 and Genesis-2120, with a 5-axis motorized stage |
| Useful selection question | Will operators position samples directly as they inspect them? | Does the workflow call for recurring or controlled positioning? |
When can a manual stage suit a laboratory workflow?
A manual stage can be a practical fit when operators want to make positioning adjustments directly while inspecting a sample. The Genesis-1000 and Genesis-1100 are EOI examples with manual stages. When considering this type of setup, think about whether the work involves operator-led exploration or frequent, repeated positioning. The answer helps you decide whether direct adjustment aligns with the laboratory’s day-to-day tasks.
What does a 5-axis motorized stage add?
The Genesis-2020 and Genesis-2120 have a 5-axis motorized stage. This is a powered positioning configuration with five axes. It may suit a workflow that calls for controlled or repeatable positioning. To assess its relevance, consider how often operators need to revisit positions and how they use the SEM during examination.
Assess sem stage and holder options against the laboratory’s positioning routine, not assumptions based on a model name or image quality. Use these questions to guide the comparison:
- Occasional operator-led exploration: consider whether direct manual adjustment aligns with the task.
- Repeated positioning: consider whether a motorized configuration better fits the workflow.
- Model comparison: compare the stated stage configuration with the positions and movements your work requires.
These stage examples apply to the Genesis family. Do not infer the same stage configuration for Cube II or Veritas. For an overview of EOI’s SEM configurations, explore EOI’s SEM options as you map stage control to laboratory requirements.
SEM Specimen Holder Options for Different Sample Shapes and Viewing Needs
Start holder selection with the specimen, not the catalogue label. Consider its shape, how it can be secured, and which surface or feature must face the electron beam. A flat sample may suit a level mounting orientation, while a fragment that needs edge inspection must be presented with its cross-section exposed. The goal is to support the specimen without obstructing the area of interest.
Select a holder around the sample’s geometry and the face you intend to view. This separates mounting from stage positioning. A stage can move a mounted specimen, but it cannot change which face the holder presents.
Which holder formats address flat, bulky, or multiple specimens?
A flat mount is a useful approach for a specimen that can be presented level. When a sample’s shape makes simple placement insufficient, a clamp-style format may help restrain it. In either case, consider whether the mount can support the sample while keeping the observation area clear.
Multi-pin and bulk holders represent different mounting arrangements. A multi-pin format may be useful when separate specimens need distinct mounting positions. A bulk format may suit a larger or more substantial specimen. Compare the sample dimensions and intended viewing face with the holder arrangement, rather than treating these categories as interchangeable.
When are cross-section, tilt, grid, or wafer holders relevant?
A cross-section holder is relevant when the exposed edge or cut section, rather than only the broad surface, is the target of observation. Angled or tilt formats change how a specimen is presented and can help expose a feature that is difficult to view in a level orientation. Start by identifying the region of interest, then decide how the sample must be oriented to show it.
Grid and wafer formats relate to workflows involving those specimen forms. Choose a format based on the sample and the view required, not its name alone. For any holder type, assess the complete mounted setup rather than looking only at the bare specimen.
- Sample dimensions: account for the specimen and its mounted profile.
- Viewing surface: determine whether the top face, edge, section, or angled feature must remain accessible.
- Restraint: consider how to secure the specimen without obscuring the target area.
- SEM configuration: account for the holder interface, chamber clearance, and any clearance needed for tilt.
These checks help you plan a holder and stage arrangement around the sample’s dimensions and intended orientation. Consider the full setup: specimen, mounting method, holder, and required viewing angle. This makes it easier to compare sem stage and holder options against the practical needs of the imaging task.

How to Choose a Stage and Holder for Your SEM Workflow
A reliable setup starts with the specimen and observation task, then considers holder fit and stage control. Keeping these decisions separate helps prevent a common mismatch: choosing a stage for its positioning method before deciding how the sample must be mounted and presented. Use this sequence to evaluate sem stage and holder options against the actual workflow.
- Record the specimen’s dimensions and shape. Note its overall form and any constraints that affect mounting. Consider whether it is flat, bulky, an edge or section, or one of several specimens to examine. These details help narrow the holder arrangements to consider.
- Define the intended viewing surface. Identify whether the task concerns a broad surface, an edge, a cross-section, or another specific feature. Note what must remain visible after mounting. Let the imaging objective guide sample presentation. For broader context on microscopy objectives, see this guide to advanced SEM techniques.
- Separate mounting from positioning. Decide what the holder must do to support and present the sample, then consider how the stage needs to position that mounted specimen. These are related requirements, not substitutes: stage movement will not resolve a mounting arrangement that hides the target area, and a suitable holder does not determine the stage’s positioning controls.
- Assess fit and access in the specific SEM. Compare the complete mounted geometry with the chamber, stage interface, and access needed for the intended view. If tilt or another orientation change is part of the task, account for the clearance required by the mounted sample. Evaluate the holder and stage together in the context of the SEM configuration.
- Match stage control to the routine. Consider whether operator-led manual adjustment suits the task or whether motorized positioning better supports the laboratory’s need for repeatability. Base the choice on how the SEM will be used, not presumed differences in image quality. The SEM operation guide offers operating context for considering positioning within a broader workflow.
Before settling on a setup, review the specimen dimensions, mounting approach, viewing face, chamber clearance, and stage interface together. Include the sample’s full mounted profile when considering tilt and access. This gives operators a shared basis for discussing practical constraints and workflow priorities.
To relate your laboratory’s positioning and mounting requirements to EOI’s SEM configurations, explore EOI’s SEM options.
Explore EOI SEM Stage Options and Plan the Next Step
EOI’s Genesis models provide a practical reference for comparing stage configurations. Genesis-1000 and Genesis-1100 use manual stages, while Genesis-2020 and Genesis-2120 have a 5-axis motorized stage. Use these differences to consider whether operator-led adjustment or motorized positioning better fits the laboratory’s routine. Then assess how the sample and holder need to be presented within the specific SEM configuration.
How the confirmed Genesis stage configurations differ
The Genesis-1000 and Genesis-1100 have manual stages; Genesis-2020 and Genesis-2120 have a 5-axis motorized stage. Genesis-1100 is also identified for observation of non-conductive samples. That sample-related feature applies to this model. The 5-axis specification applies to Genesis-2020 and Genesis-2120, not to Cube II or Veritas.
For selection, match these distinctions to the intended work. A manual stage supports direct operator positioning, while the motorized-stage configuration offers a different way to position the sample. Consider the holder, sample geometry, and required viewing access as part of the same setup when evaluating sem stage and holder options.
Connect technical selection with long-term SEM support
Stage configuration is one part of a sound SEM decision. Sample geometry, mounting requirements, viewing access, and the laboratory’s positioning routine all contribute to the overall fit. Cube II is the smallest conventional SEM on the market today. Its stage configuration is distinct from the Genesis examples, so compare each model using its stated product information and the needs of your workflow.
EOI’s support extends beyond equipment selection. Its engineers provide on-site SEM service and training. The service engineers are factory-trained and have an average of over two decades of experience, and the service team is available 24/7/365. Service is required to keep equipment operating at optimal specifications. EOI is committed to providing an effortless experience for the lifetime of the equipment.
Use the Genesis stage distinctions as a starting point, then bring your sample and positioning requirements into the configuration decision. Explore EOI’s SEM solutions to consider the available SEM options for your laboratory workflow.
Turn Your Sample Requirements Into a Confident SEM Setup
For your next instrument evaluation, build a concise setup brief around a representative specimen and the imaging work it must support. Record the sample’s form, the surface or feature that matters most, and how often operators need to reposition it. This gives your team a practical reference for comparing sem stage and holder options against the work you actually do.
Use that brief to connect technical requirements with a system suited to your laboratory’s workflow. EOI brings over 30 years of industry experience to SEM selection and long-term equipment support, helping laboratories consider both application needs and ongoing operation.
Explore the available configurations and identify a useful next step for your application. Explore EOI’s SEM solutions and move forward with a setup decision grounded in your sample and imaging priorities.
Frequently Asked Questions
What is the difference between an SEM stage and a specimen holder?
The holder supports the specimen, while the stage positions the mounted specimen within the SEM. If a sample slips or its target face is obscured, review the mounting arrangement. If the sample is secure but the operator needs to reposition it, stage control is the relevant consideration. Keeping these functions distinct makes setup decisions and equipment comparisons more specific.
Are SEM specimen holders compatible with every scanning electron microscope?
Holder compatibility is not universal. Fit depends on the holder interface, the SEM configuration, the mounted sample’s geometry, and chamber clearance. A holder may attach correctly yet restrict access to a feature or orientation needed for imaging. Consider fit and clearance as part of the complete setup rather than relying on the holder’s category name.
What SEM holder is suitable for viewing a sample cross-section?
A cross-section holder is a relevant category when the exposed edge or cut face is the target of observation. The right arrangement depends on the specimen’s shape and how the section needs to face the imaging system. Consider whether the sample can be secured without covering the area of interest, and include the mounted sample’s clearance in your setup.
When would an SEM use a tilt or angled holder?
A tilt or angled holder can present a specimen feature that is difficult to access in a level orientation. This may be useful when the target lies on a sloped face or an oblique view is needed to examine a feature’s profile. Account for chamber clearance and the complete mounted geometry when planning the setup.
Can an SEM observe non-conductive samples?
EOI identifies the Genesis-1100 for observation of non-conductive samples. This is a model-specific capability. Sample preparation and imaging conditions can affect the examination, so consider the material and analysis objective when planning the setup.
Is a motorized SEM stage always better than a manual stage?
No. The better choice depends on the laboratory’s positioning routine. Manual adjustment may fit work where an operator explores specimens directly, while a motorized stage may suit workflows that call for repeated positioning. A lab examining different individual samples may prioritize direct operator control, while a task that revisits positions may benefit from powered movement. Choose based on the work, not an assumed difference in image quality.
How do I choose an SEM holder for samples with different shapes?
Start with each specimen’s dimensions, shape, mounting constraints, and the face or feature that must remain visible. A flat specimen, a bulky piece, and a sample with a target edge may call for different presentation approaches. For a varied sample set, assess each specimen rather than assuming one holder format will suit all. Include the mounted profile and SEM clearance when comparing sem stage and holder options.